Simplifying AWS Account Management with AWS Organizations and Identity Center
Managing multiple AWS accounts, whether for individual freelancers or companies, can become overwhelming. To overcome this, AWS Organizations and Identity Center offer a powerful way to ease this process, providing much simpler account management, centralized billing, and enhanced security.
In this writeup, we’ll explore the advantages of using AWS Organizations and Identity Center and guide you through setting them up.
Why Use AWS Organizations and Identity Center?
Here are the key advantages of using AWS Organizations with Identity Center for account management:
1. Centralized Account Management
By grouping multiple AWS accounts under a single organization, account owner can manage everything centrally. This simplifies tasks like billing, access control, and policy enforcement.
2. Consolidated Billing
AWS Organizations allows for consolidated billing, meaning all member accounts’ usage is sum up into one bill. This is very helpful for tracking overall services cost and AWS also offer discounts through AWS pricing plans.
3. Security and Isolation
For a better security, isolating different projects with individual accounts is a must. If one project is compromised, it does not impact the others, keeping resources isolated.
4. Simplified User Management with Identity Center
AWS Identity Center makes it easy to manage user access to multiple accounts. Account owners may assign permissions once and apply them across all accounts, saving time and effort when granting or revoking access.
Step-by-Step Tutorial: Setting Up AWS Organizations and Identity Center
Here’s how you can set up AWS Organizations and Identity Center for easier management of multiple AWS accounts.
Step 1: Create an AWS Organization
- Log in to AWS Management Console.
- Navigate to AWS Organizations from the Services menu.
- Click Create Organization. This enables creating new accounts or invite existing ones into the organization.

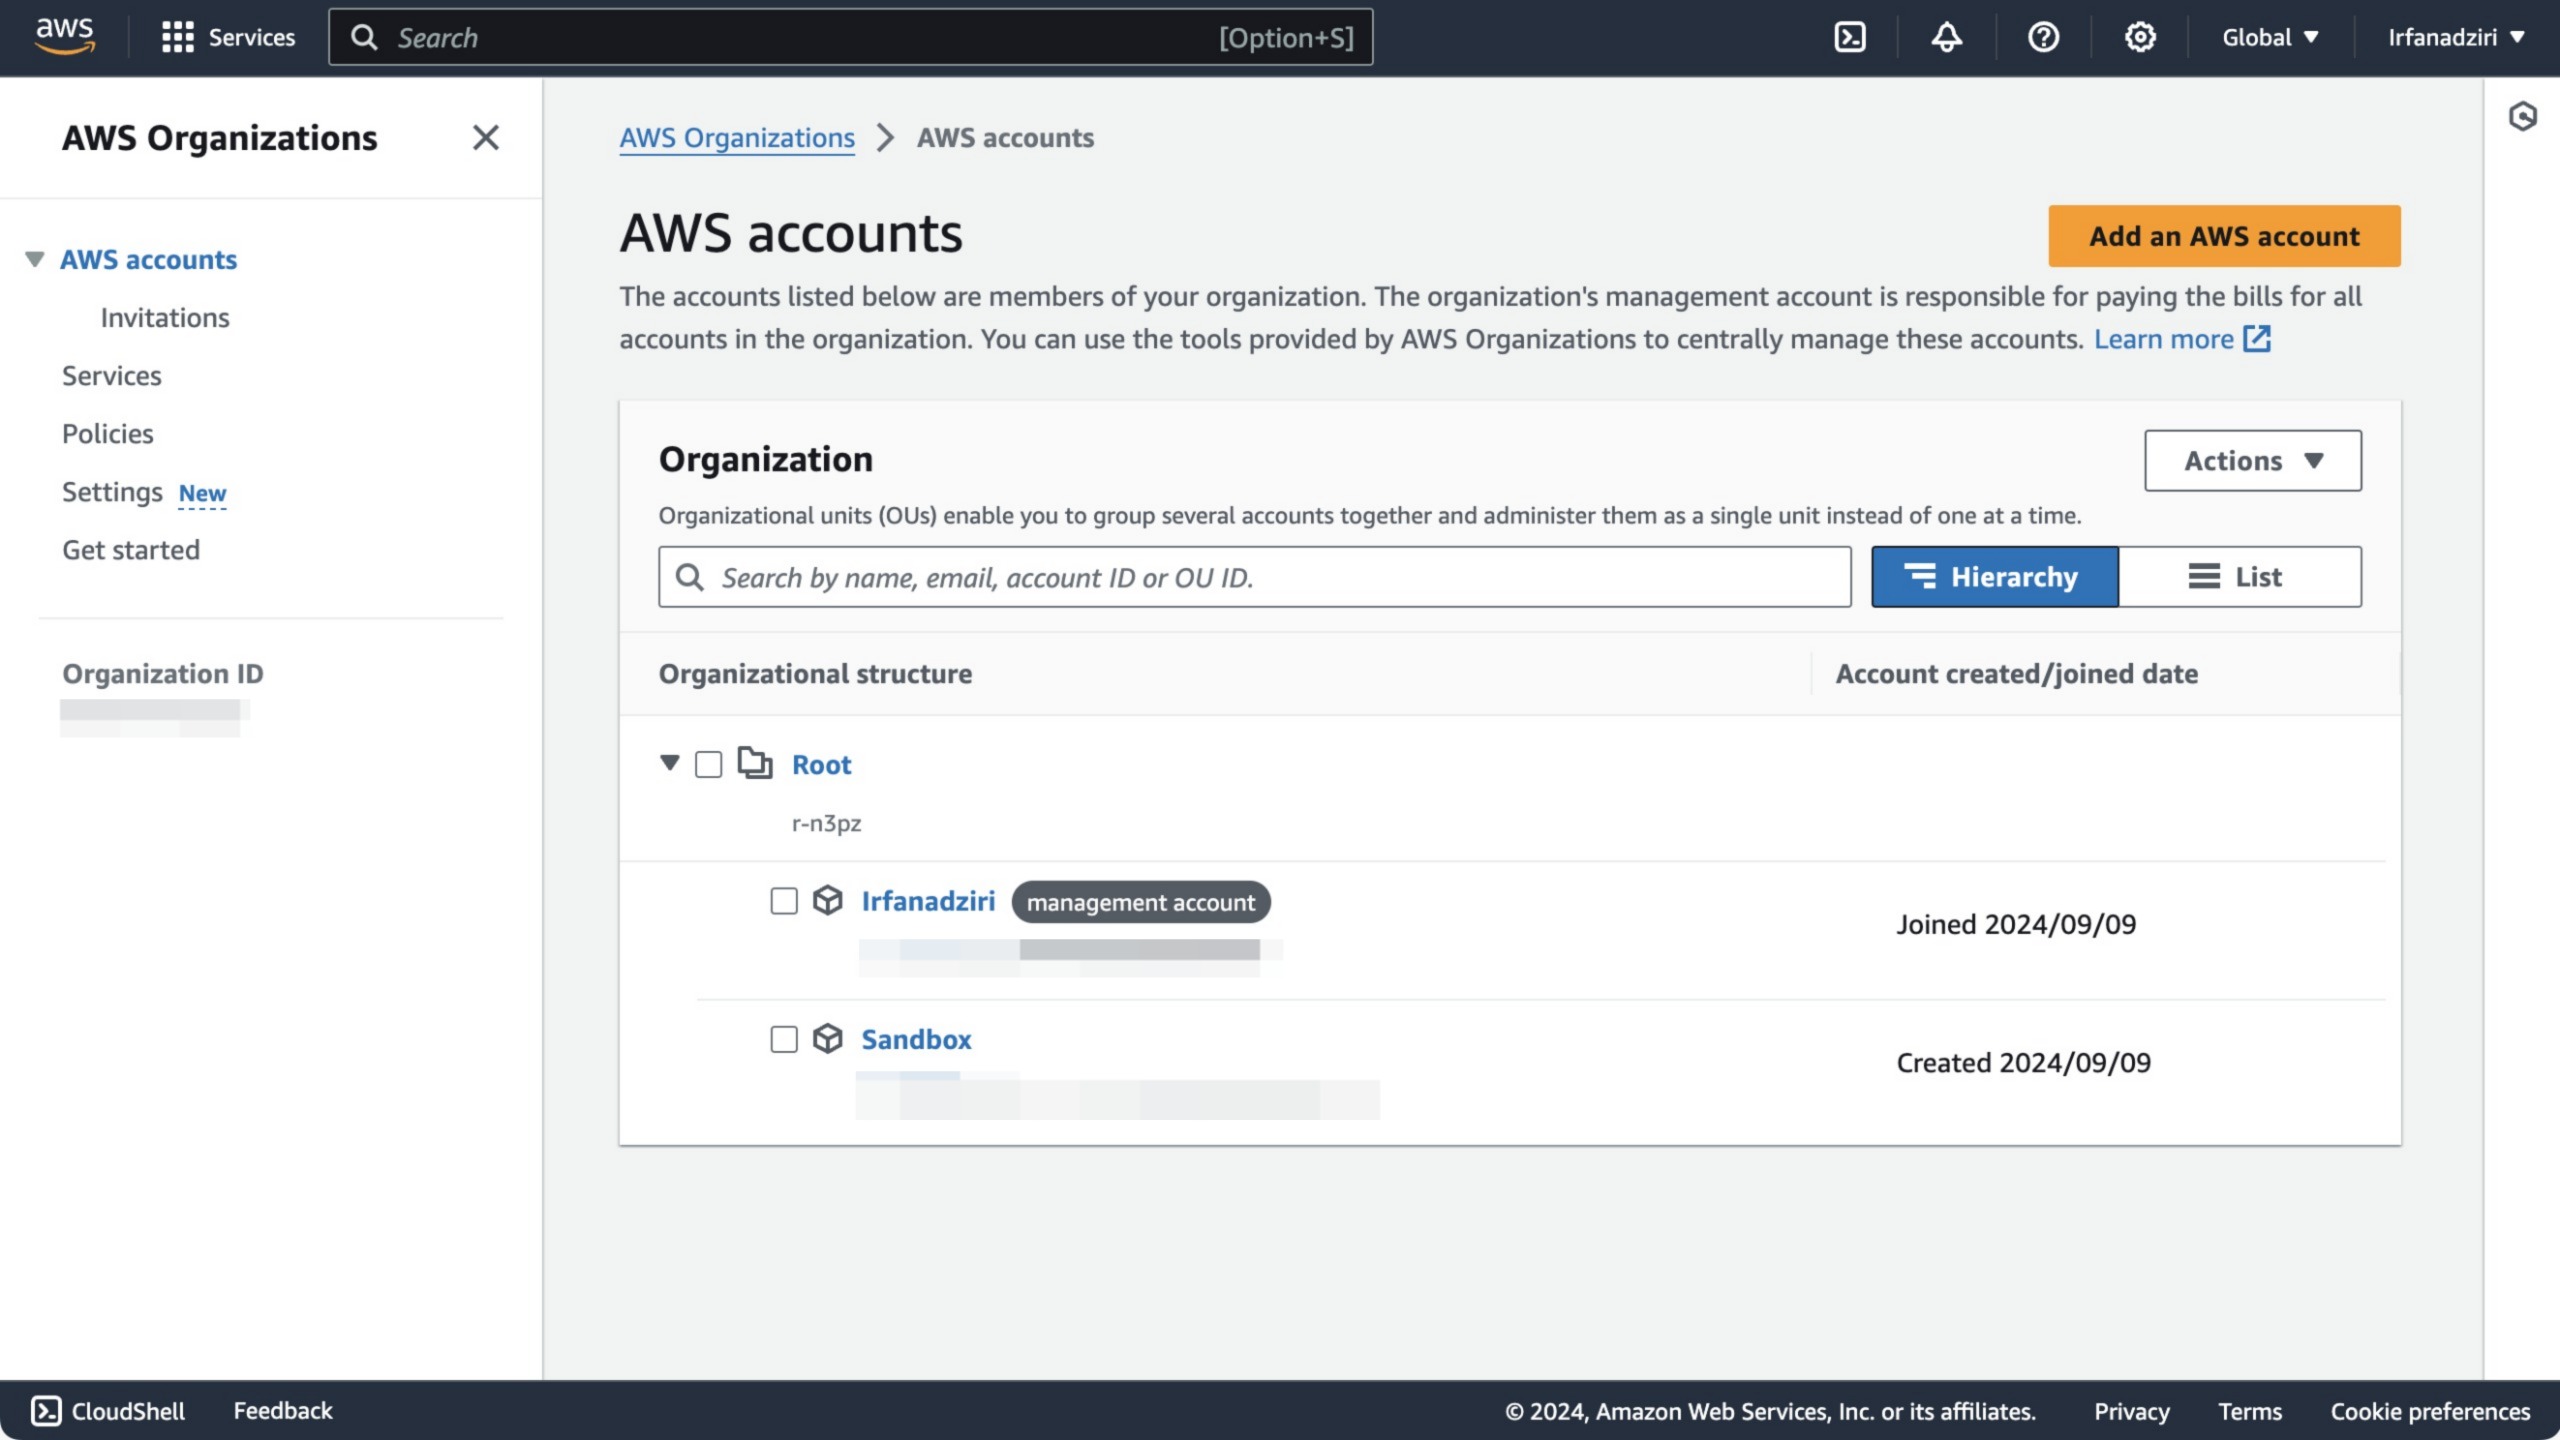
Screenshot: AWS Organizations Dashboard
Step 2: Add Accounts to Your Organization
- Once the organization is created, you’ll see an option to Add an Account.
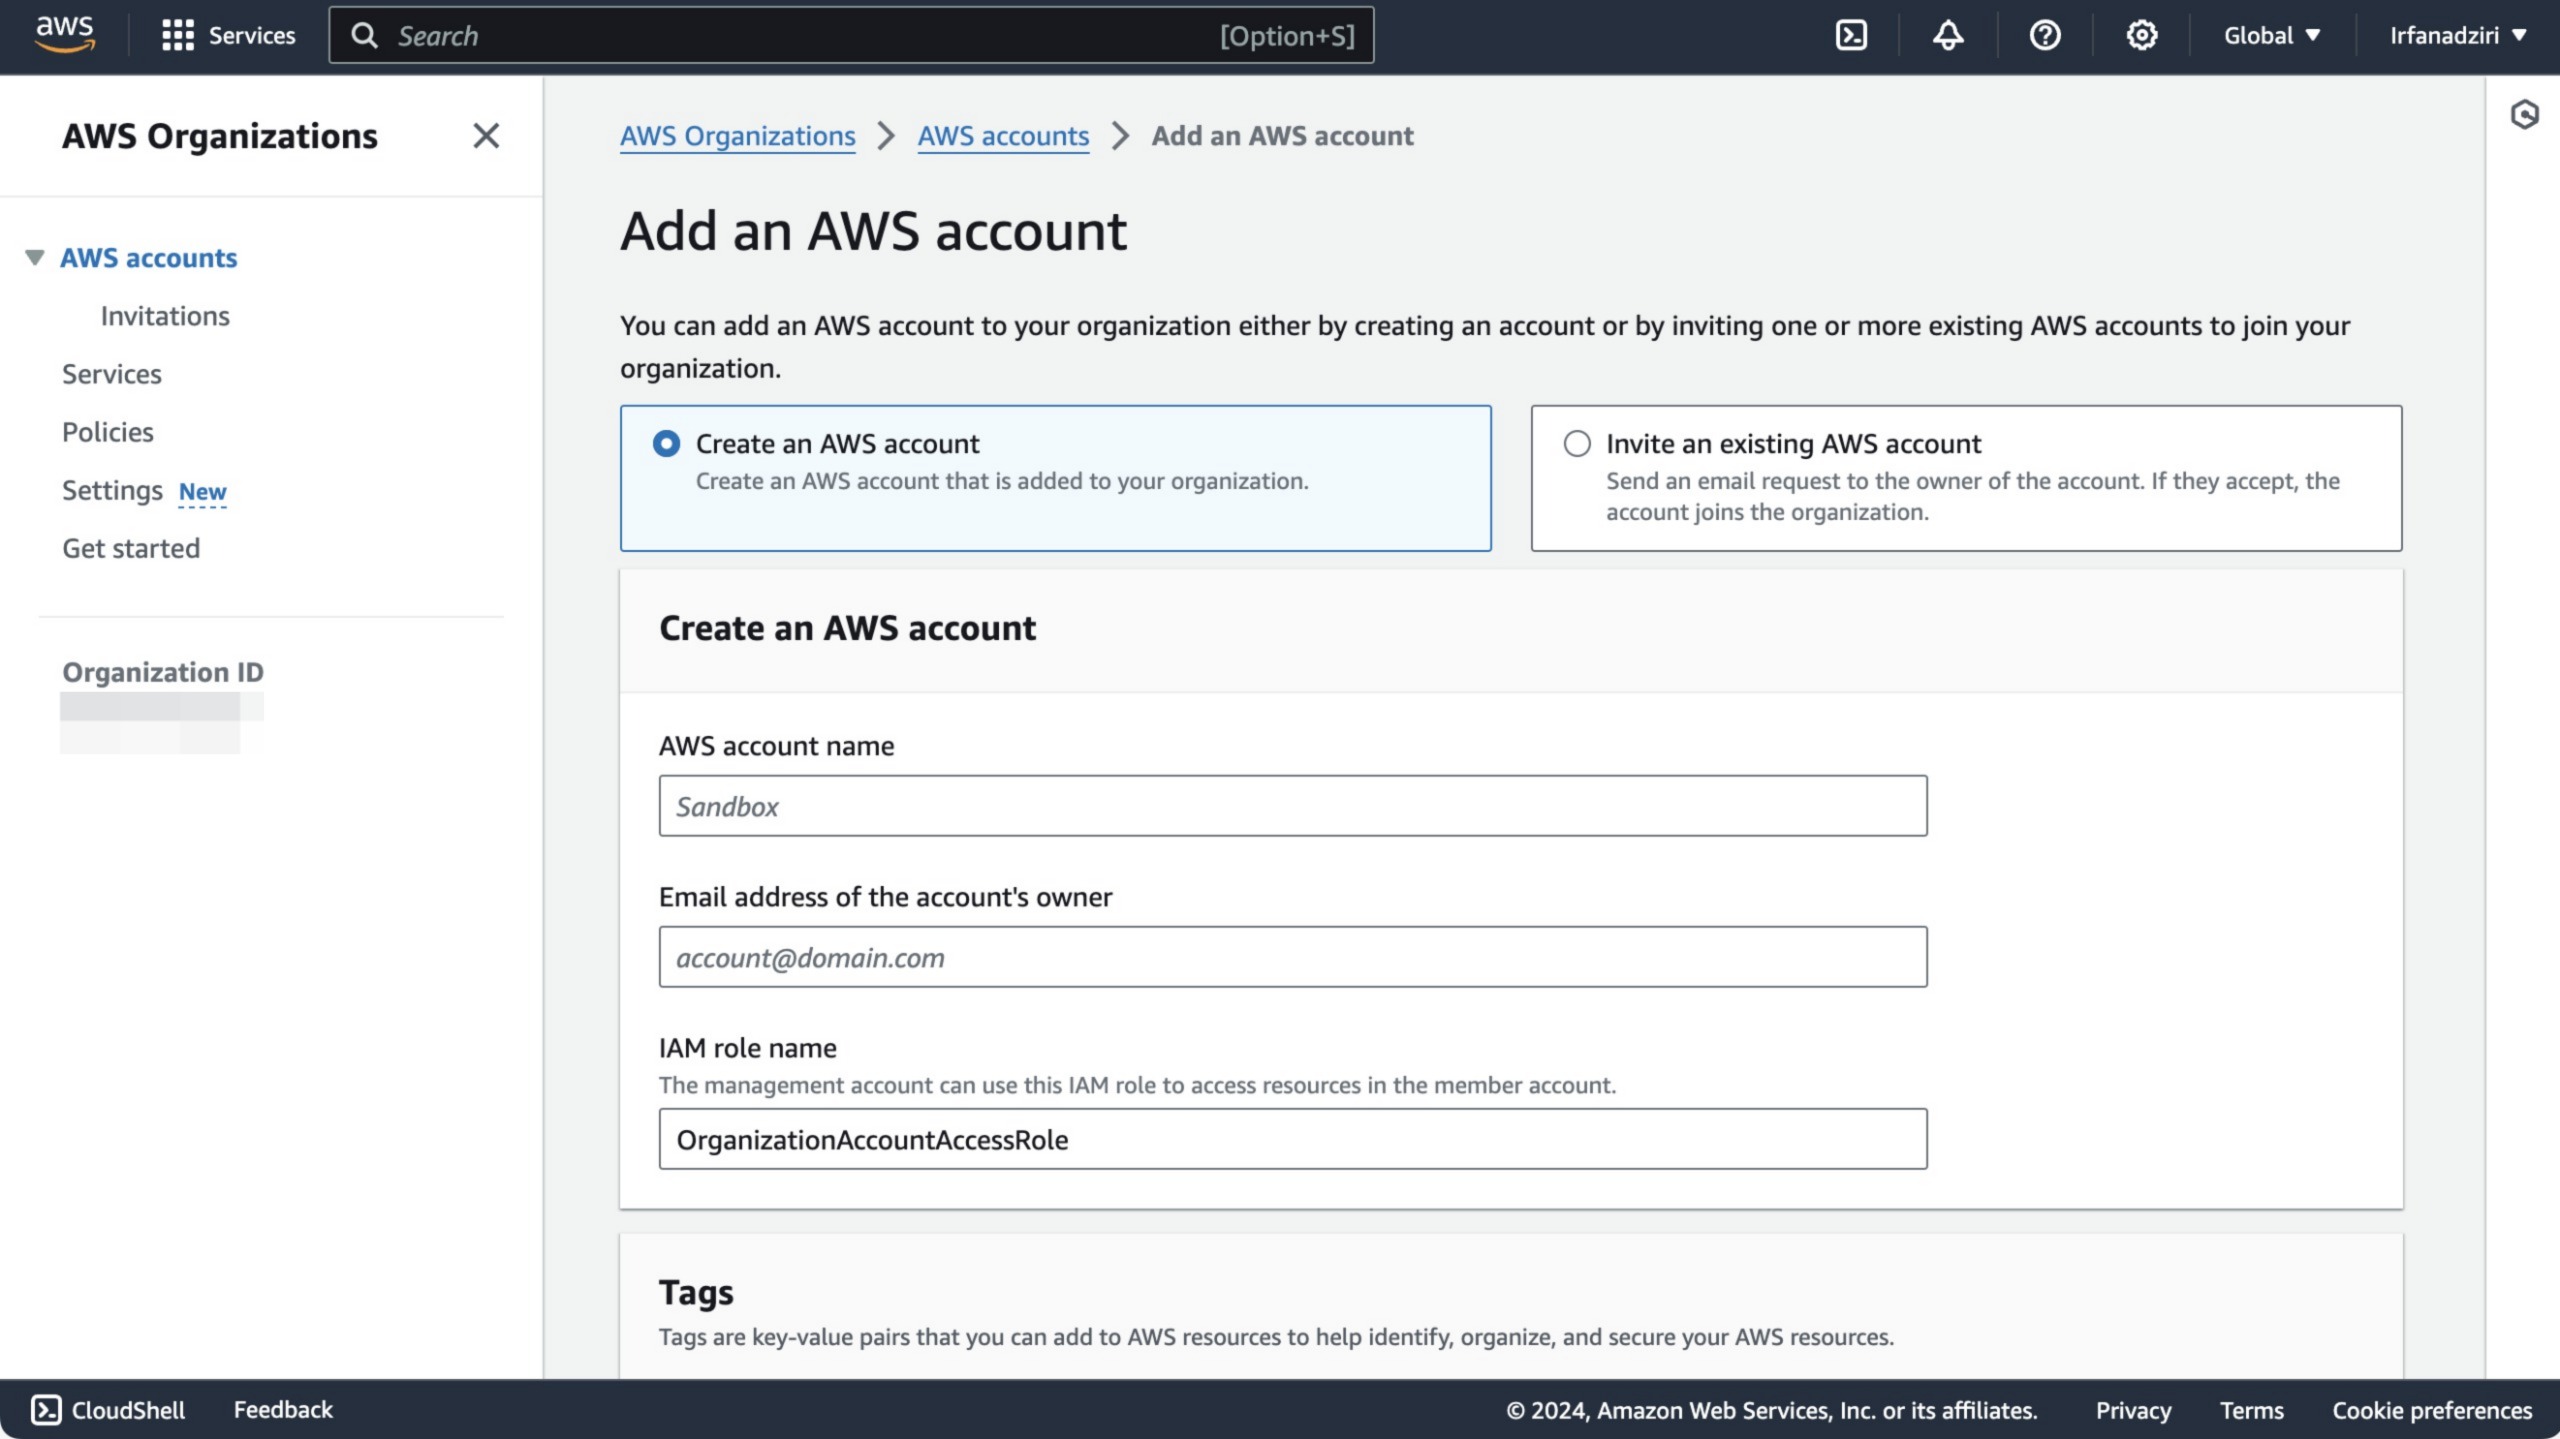
- A new account can be created or existing AWS account can be invited to join the organization.

Screenshot: Adding New Account in AWS Organizations
Step 3: Enable AWS Identity Center
- In the AWS Management Console, navigate to AWS Identity Center (formerly AWS Single Sign-On).
- Click Enable Identity Center. This will allow you to manage access for users across all AWS accounts in the organization.

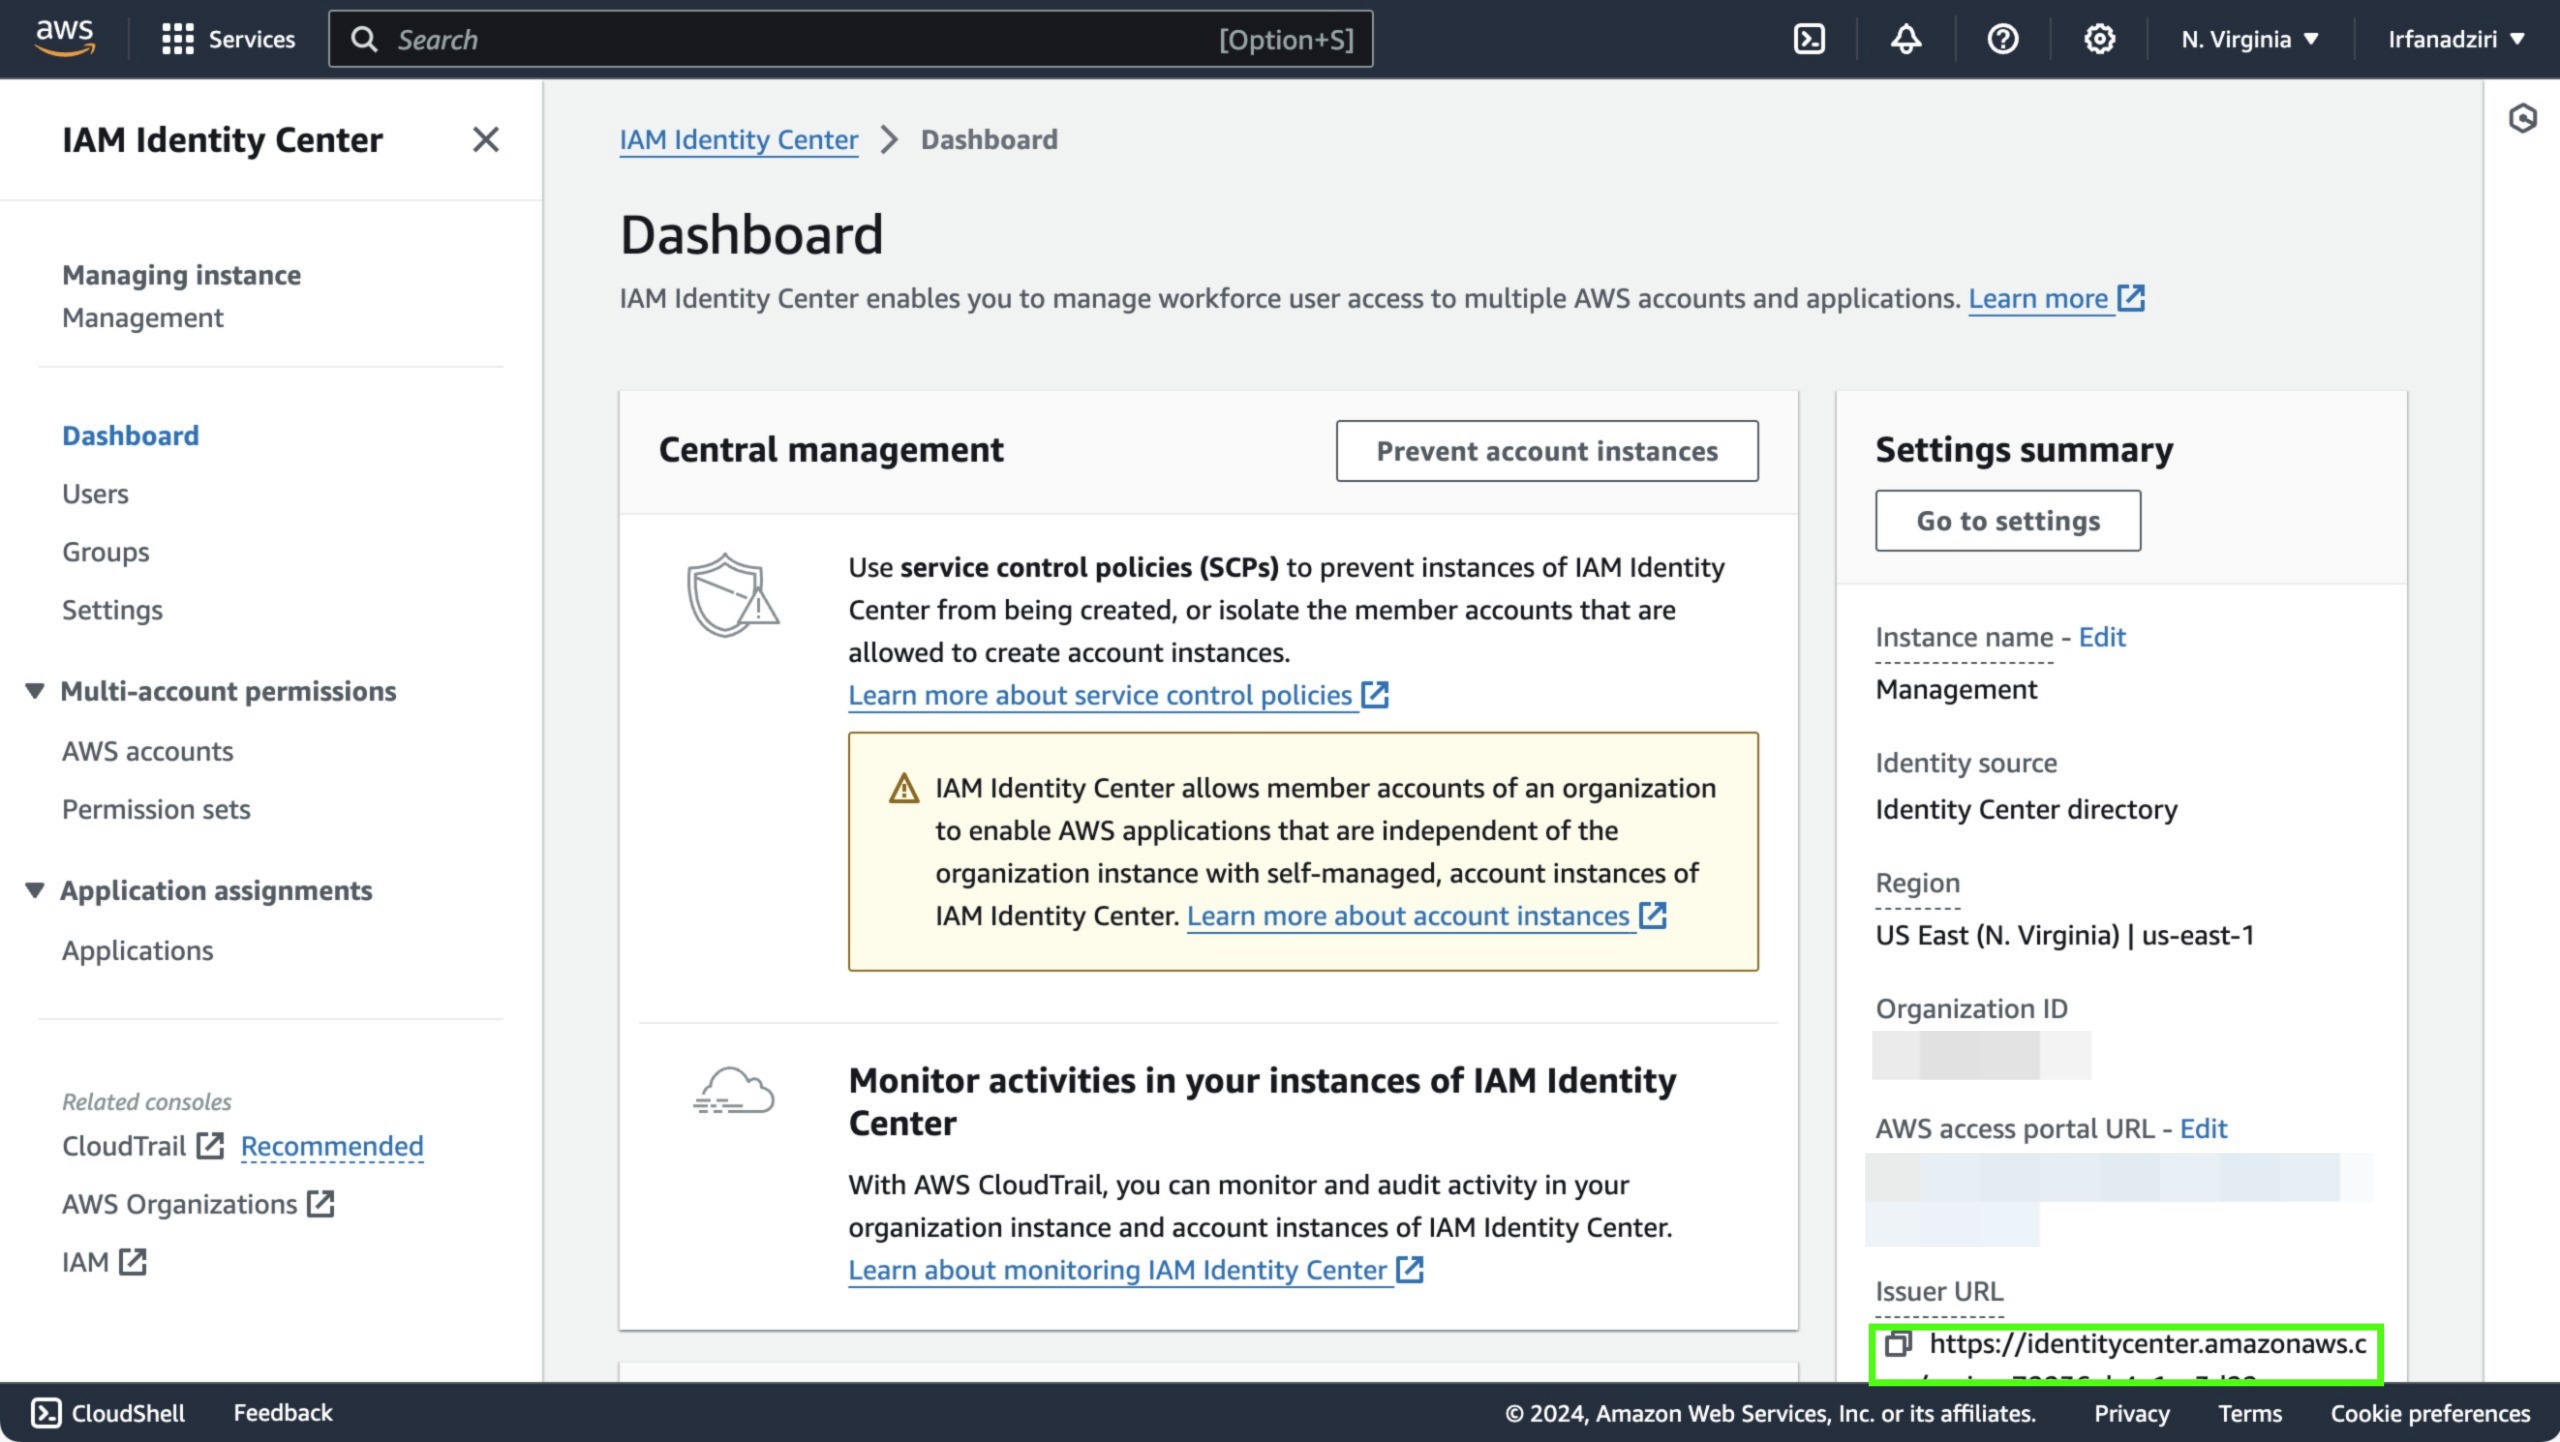
Screenshot: AWS Identity Center Dashboard
Step 4: Create a User in Identity Center
- Go to the Users tab in the Identity Center dashboard and click Create User.
- Fill in the required details (username, email, etc.).
- Once the user is created, you can assign them roles within your AWS accounts.
Step 5: Assign Permission Sets
- Under Permission Sets, click Create Permission Set.
- Choose one of the predefined roles like AdministratorAccess or PowerUserAccess, or create a custom permission set.
- Assign this permission set to your user across the AWS accounts they need access to.
Step 6: Access AWS Accounts via Identity Center
- From IAM Identity Center Dashboard; under the Settings Summary, copy the AWS access portal URL.
- Once the users have been assigned permissions, they can log in to AWS using the Identity Center login portal.
- From there, they can access any AWS account they have been granted permissions for.

Screenshot: IAM Identity Center User Login Page
Conclusion
The combination of AWS Organizations and Identity Center make it easier to manage multiple AWS accounts centrally. The benefits of centralized billing, user access control, and security isolation provide significant advantages.
Following the steps above, the AWS account management process is so much more centralized, allowing for smoother project execution and better cost control.